











How to Install my eSIM?
eSIM QR installation
Before starting the installation process, make sure:
- Internet connection is available
- The eSIM QR code you received is ready for scan (printed, saved to the phone's gallery, or displayed on another device)
Watch on YouTube
- Open Settings
- Tap Cellular
- Tap Add eSIM/Add cellular plan
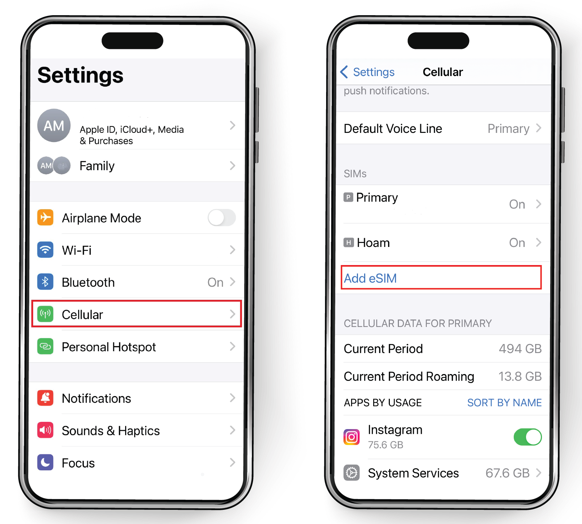
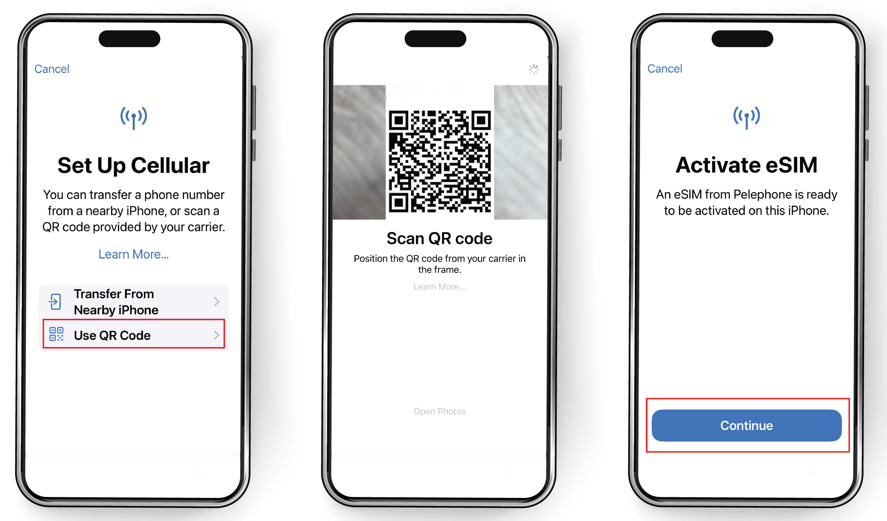
- Tap Use QR Code
- Scan the QR code
- Tap Continue
- WAIT a few minutes for your eSIM to activate, and tap Done
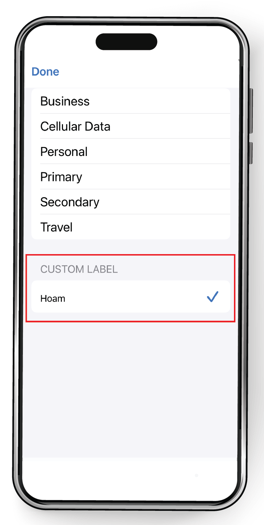
- Add a Label to your eSIM: Enter HOAM or any preferred label**.** Then tap Continue.
- SELECT your Primary Line for calls and text messages, and tap Continue.
- SELECT your Primary Line for iMessage & FaceTime, and tap Continue
- SELECT your Primary Line for Cellular data
- ENSURE that Allow Cellular Data Switching is turned off, and tap Done
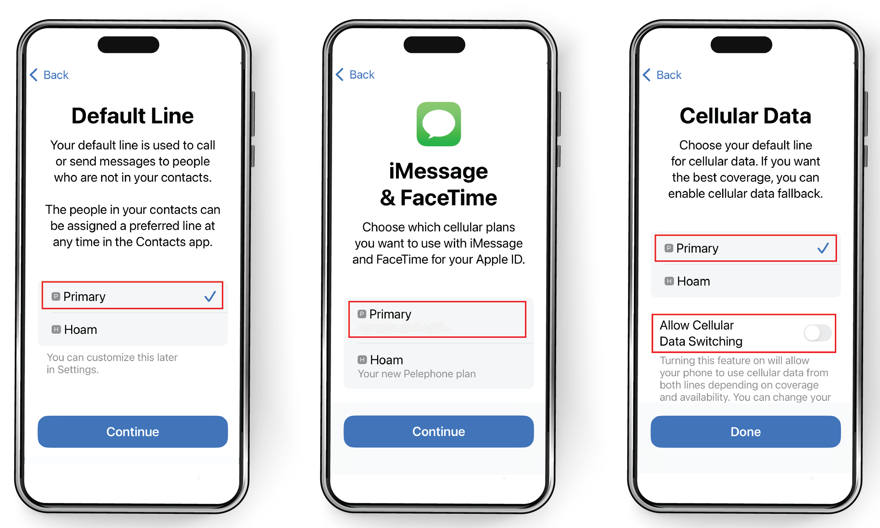
After completing these steps, the installation is completed and you will see your new eSIM on your eSIMs list.
Make sure Data roaming is enabled ONLY on your eSIM, for a quick connection at the destination:
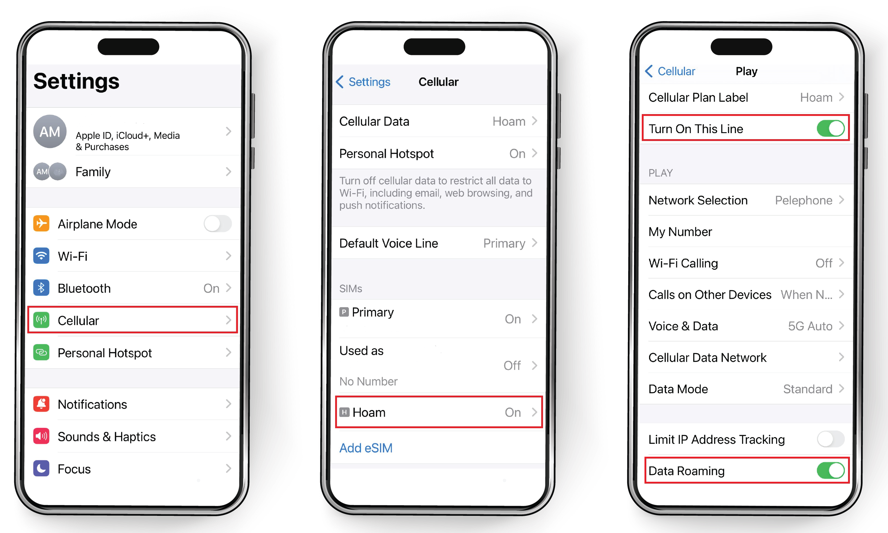
- Open Settings
- Tap Cellular
- Tap your eSIM
- ENSURE that the eSIM is enabled. If not, toggle Turn ON This Line
- TOGGLE Data Roaming ON
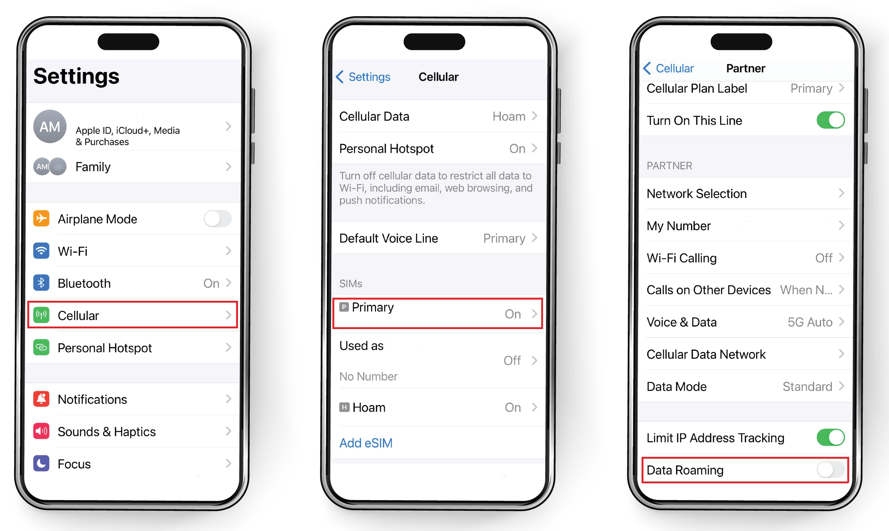
- Go back to Cellular
- Select your Primary Line this time
- Toggle Roaming Data OFF
This will make sure you avoid any charges on your original SIM plan.
After these steps, please Turn OFF your eSIM until you'll reach the destination.
Once you’ve reached your destination, Turn ON your eSIM and ensure mobile data is set to your eSIM:
- Open Settings
- Tap Cellular
- Tap Cellular Data and select your eSIM
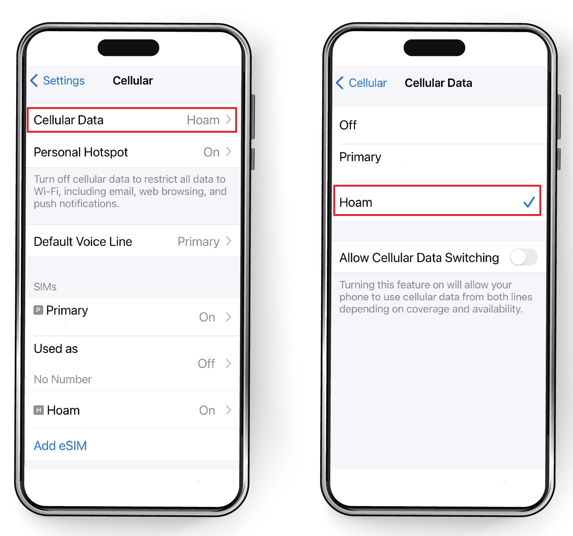
Your eSIM should automatically connect to a supported mobile network. If you need more assistance, please contact us, and we’ll be happy to help.